Roku
Instructions for installing RevenueCat's Roku SDK
General setup
Prerequisites
Setting up your Roku developer account
Follow the First Steps guide to create a Roku developer account, log in to your Roku device and enable developer mode on your Roku device.
Setting up your Roku channel
Once you have your developer account created, head to the dashboard
- First, create a new Channel.
- If you want to use this channel for testing, make sure the channel is enabled for billing testing.
- Under "Monetization" -> "Test users", add a test user with the email associated to your Roku device.
- Under "Monetization" -> "Product", follow the process to submit the tax documents, and after you're approved, you can create in-channel products.
App configuration
- Make sure your project has been enabled to create Roku apps. If you're not sure, talk to your RevenueCat contact.
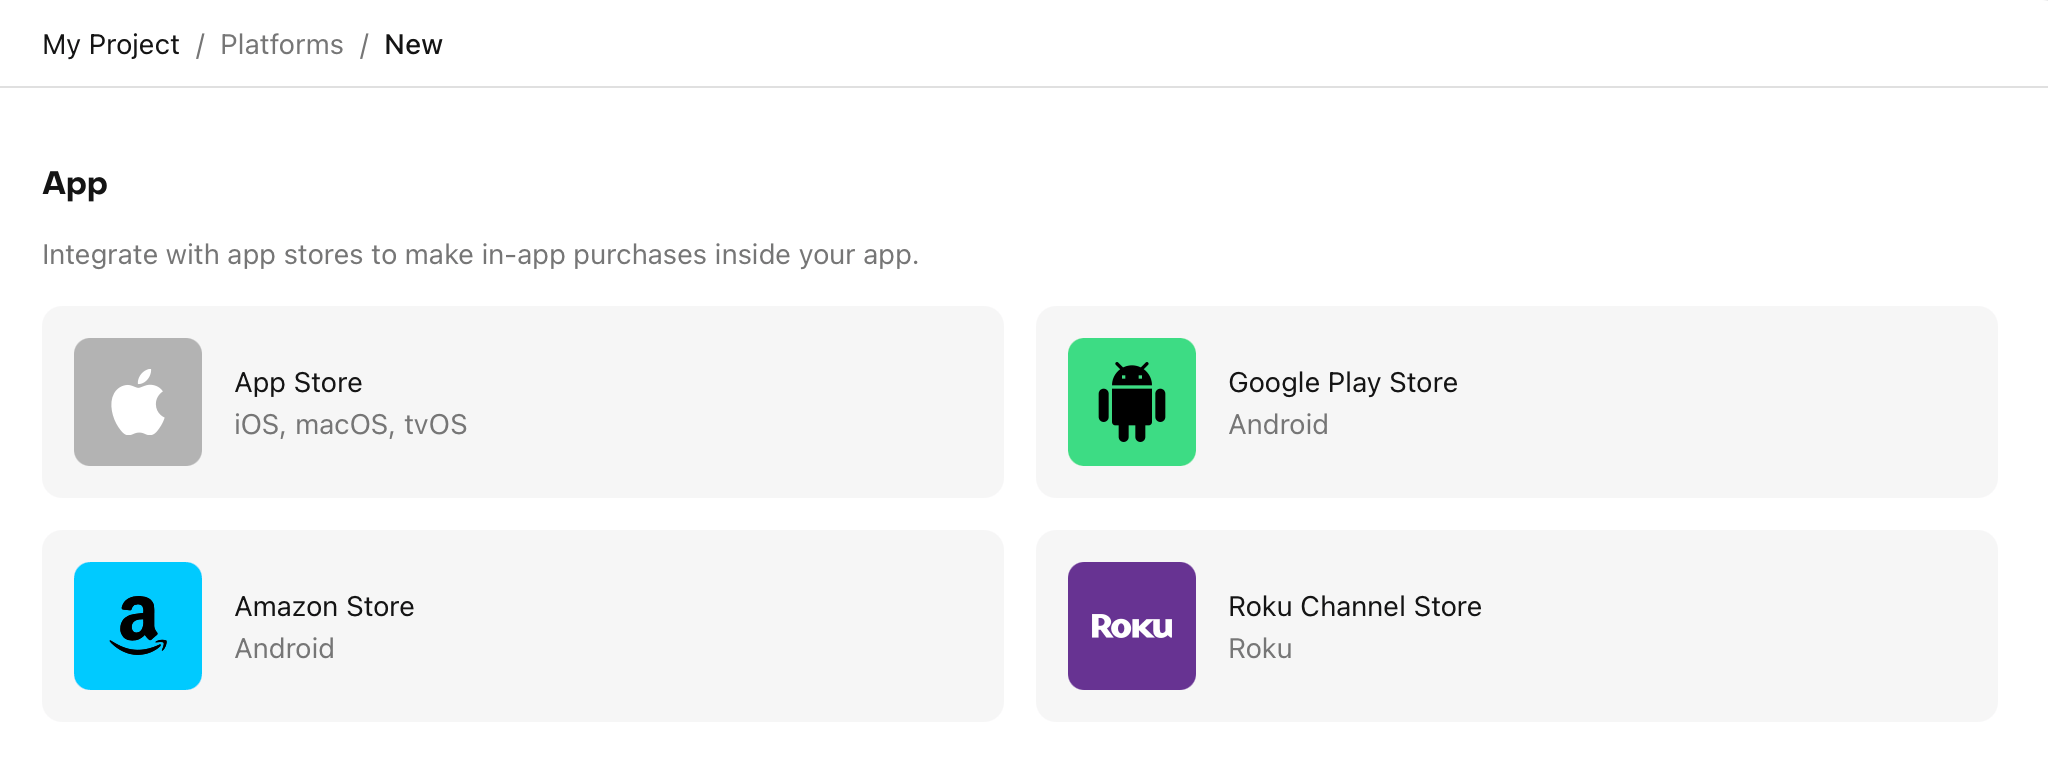
- Open the RevenueCat dashboard, select your project, and go to "Apps & providers" to click "Add app config" > "Roku Channel Store".
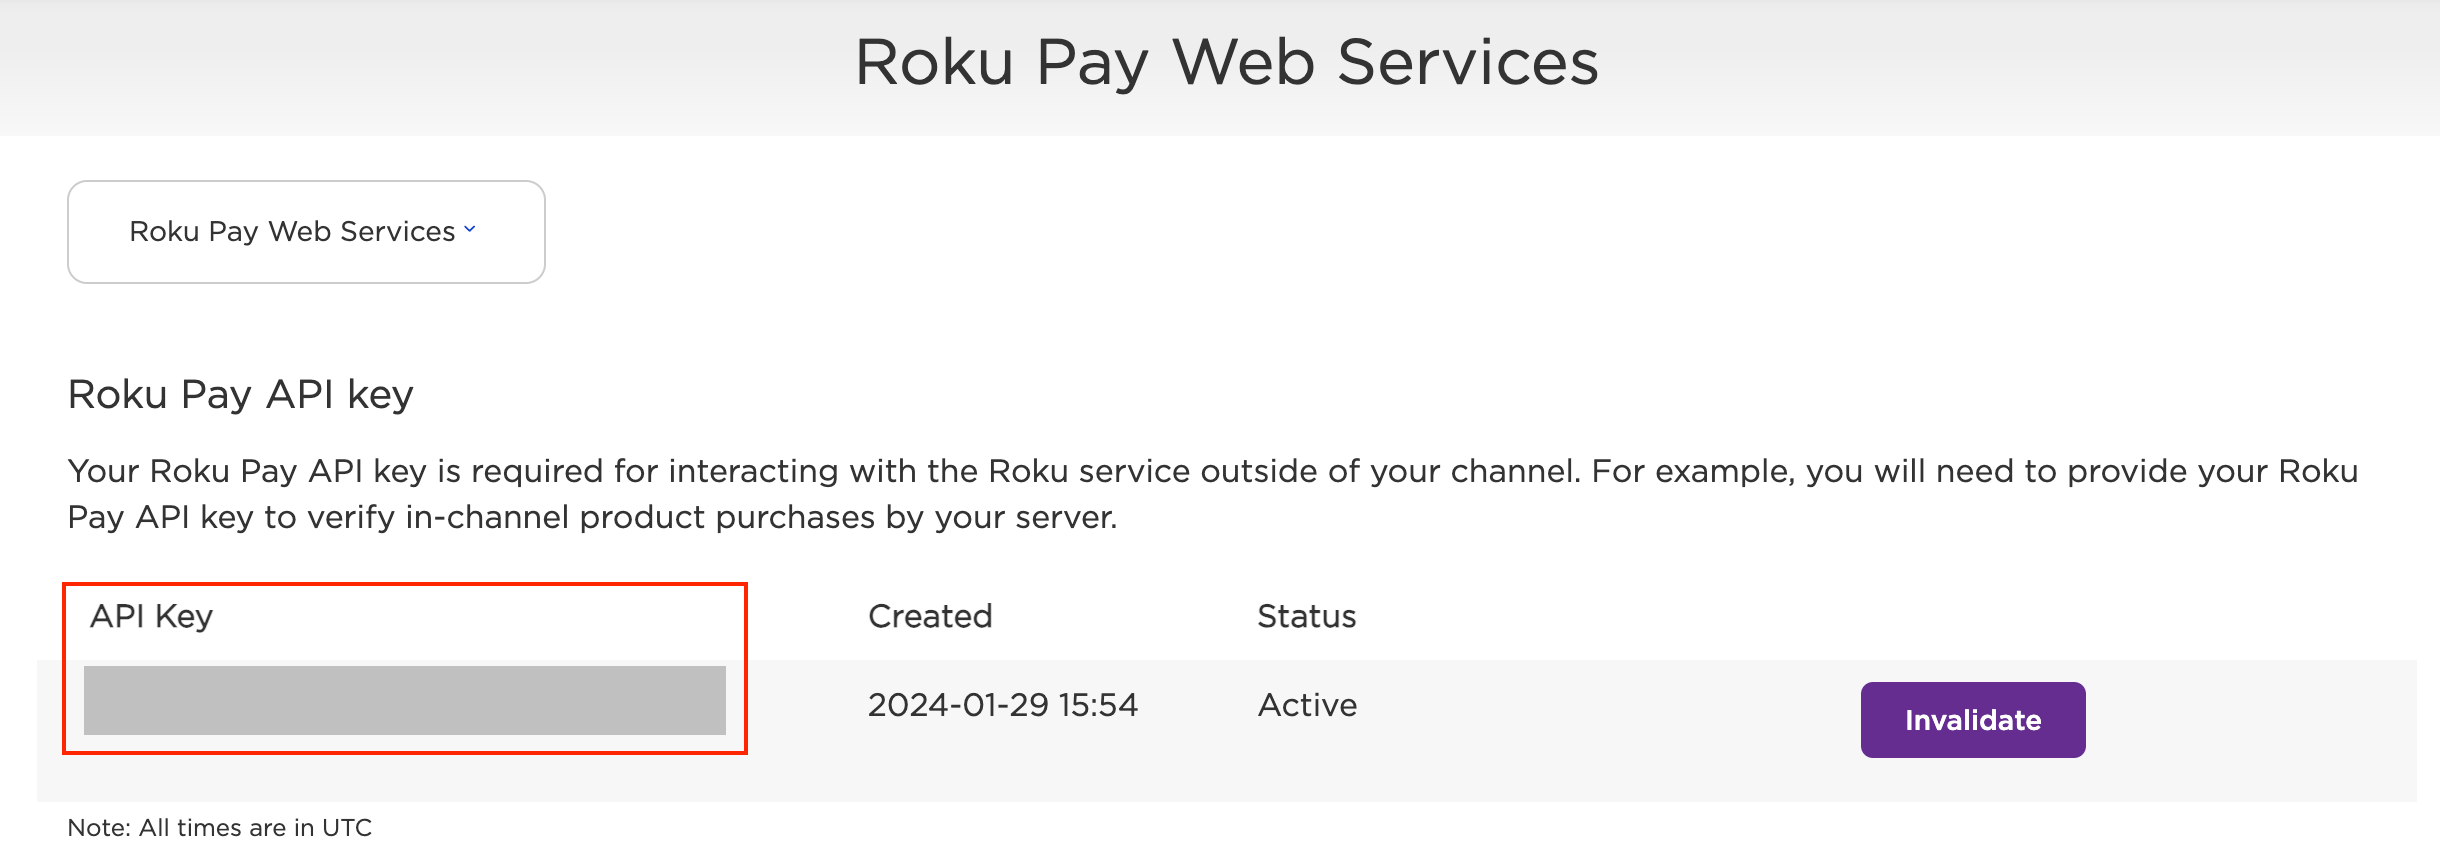
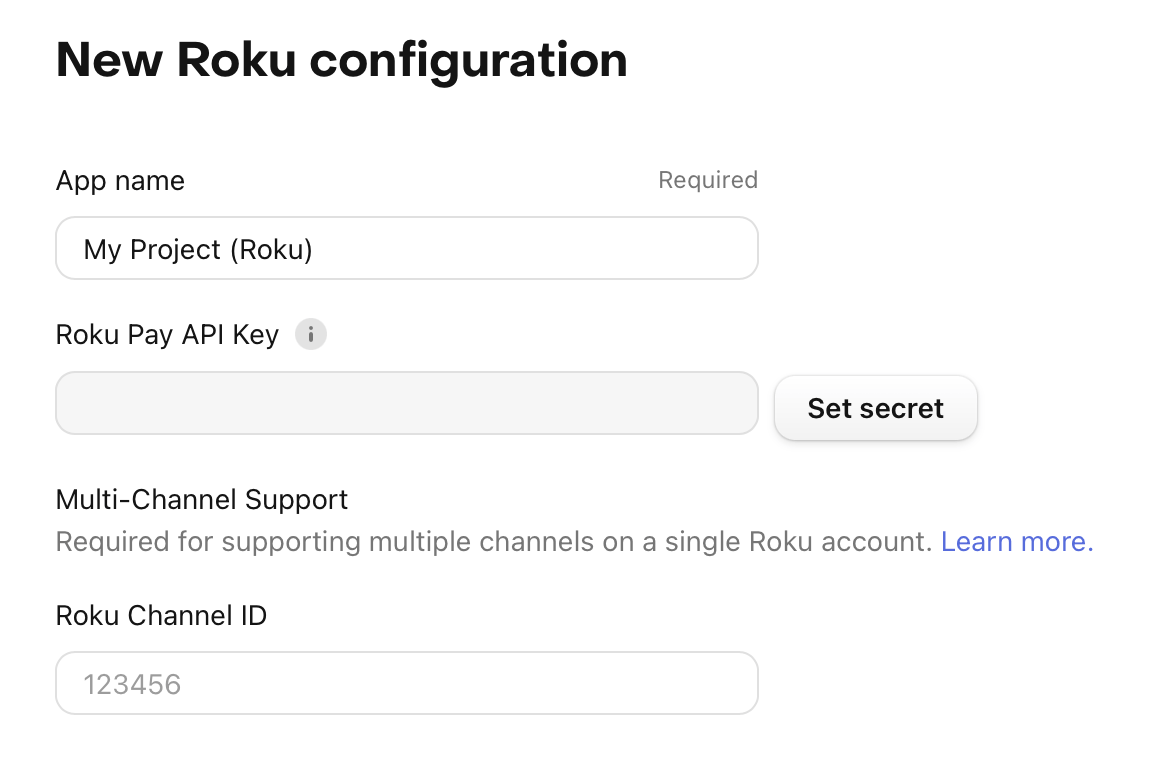
- Navigate to the Roku Pay Web Services page to copy your Roku Pay API key and paste this to the RevenueCat dashboard under 'Roku Pay API Key'. The Roku Pay API key must be set before being able to select 'SAVE CHANGES'.
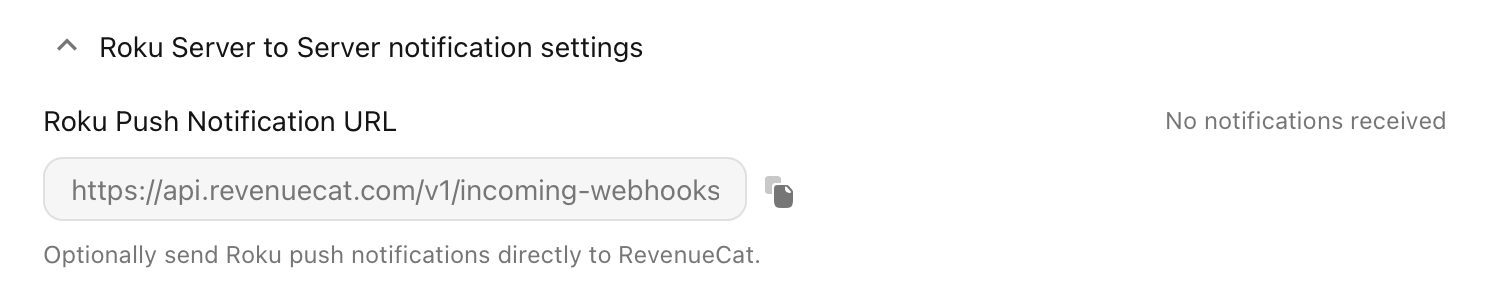
- Once the app is created, click on the "Roku Server to Server notifications settings", copy the "Roku Push Notification URL" which starts with
https://api.revenuecat.com/v1/incoming-webhooks/roku-pay-jwt-notification. Navigate back to your Roku Pay Web Services page (where you found the Roku API key) and scroll down until you see a section called 'Push Notifications' and paste RevenueCat's Push notifications URL in the text box.

- Back to the RevenueCat dashboard, click on "Public API Key" and copy over the value which should start with "roku_XXXXXX". You will need it to configure the SDK later.

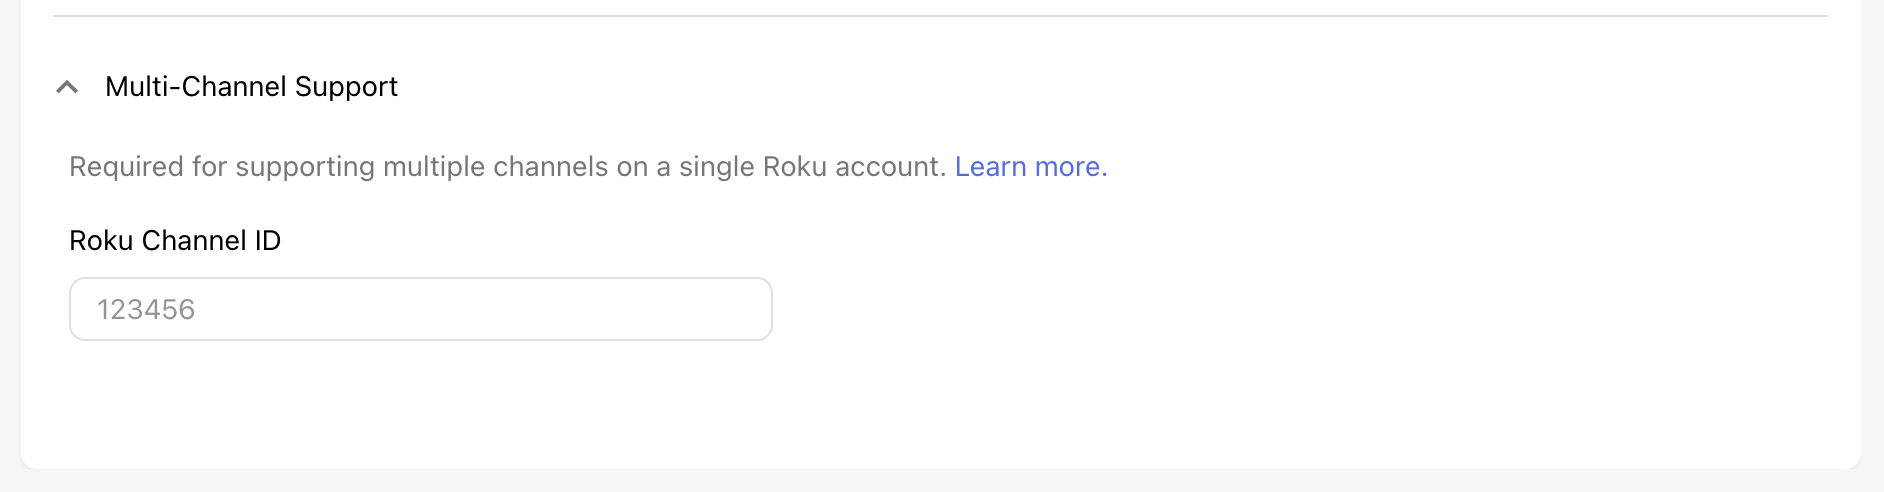
Multi-channel support
The Roku channel ID is required for supporting multiple channels on a single Roku account. If your Roku account has more than one Roku Channel, you will need to enter your Channel ID for each Roku app on the RevenueCat dashboard.
- Navigate to your Roku Developer Dashboard.
- On the left-hand side of the Developer Dashboard, you'll see the main navigation panel. Under 'Channel', navigate to where your channel is located (e.g: public or beta channels) and select the channel.
- Find your Roku Channel ID and copy this value.
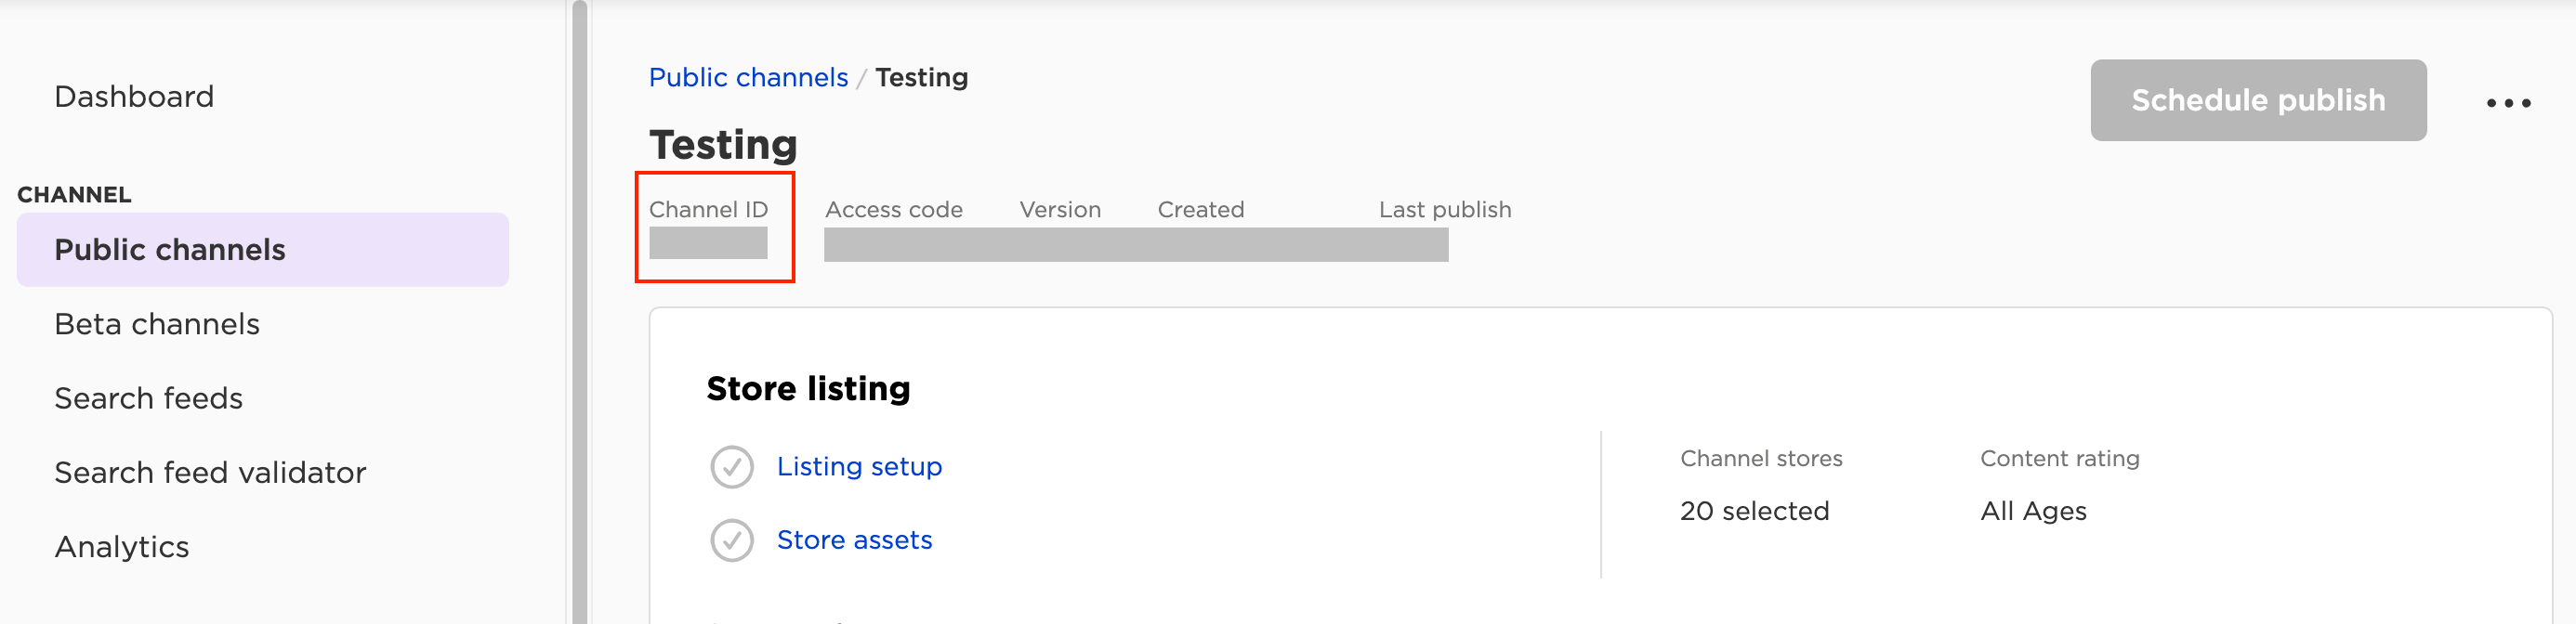
- Back in the RevenueCat app settings page, enter your Roku Channel ID the 'Multi-channel support' expanded section.
Product configuration
After you have configured the Roku Store app on RevenueCat, you should create your in-channel products and then follow RevenueCat's regular setup of entitlements, products, and offerings.
Installing the SDK

- Clone the repository:
- Terminal
git clone https://github.com/RevenueCat/purchases-roku
- Copy the
components/purchasesfolder into your app'scomponentsfolder. - Copy the
source/Purchases.brsfile into your app'ssourcefolder. - Import the SDK in the .xml file of the component where you want to use it:
- XML
<!-- Importing the RevenueCat SDK -->
<script type="text/brightscript" uri="pkg:/source/Purchases.brs" />
Configuring the SDK
Important: The SDK should be used only from SceneGraph components. Calling it from the main thread or from a Task component is not supported.
Initialize the SDK with your api key. You typically do this inside the init() method of your main scene.
- Brightscript
sub init()
    Purchases().configure({
        "apiKey": "roku_XXXXX",
        "userId": "my_user_id" ' optional, will use an anonymous user id if not provided
    })
end sub
Callbacks and error handling
In methods of the SDK which perform async operations, you can get the result by passing a sub routine or a callback name.
- The first parameter will contain the result.
- The second parameter will contain an error if there was one, or
invalidif there wasnt.
Example:
- Brightscript
sub init()
  Purchases().logIn(my_user_id, sub(subscriber, error)
    if error <> invalid
      print "there was en error"
    else
      print subscriber
    end if
  end sub)

  ' To use a function as callback, pass its name as second parameter
  Purchases().logIn(my_user_id, "onSubscriberReceived")
end sub

sub onSubscriberReceived(e as object)
    data = e.GetData()
    if data.error <> invalid
      print "there was en error"
    else
      print data.result
    end if
end sub
Models
Subscriber
- Subscriber Object
- logIn / logOut
- Subscriber Info
- Subscriber Attributes
' The subscriber object is returned from different APIs. Here's an example of what it looks like:
{
  activeSubscriptions: ["my_product_id"]
  allExpirationDatesByProduct: {
    "my_product_id": <Component: roDateTime>
  }
  allPurchaseDatesByProduct: {
    "my_product_id": <Component: roDateTime>
  }
  allPurchasedProductIds: ["my_product_id"]
  entitlements: {
    all: {
      billingIssueDetectedAt: invalid
      expirationDate: <Component: roDateTime>
      identifier: "premium"
      isActive: false
      isSandbox: true
      latestPurchaseDate: <Component: roDateTime>
      originalPurchaseDate: <Component: roDateTime>
      ownershipType: "PURCHASED"
      periodType: "normal"
      productIdentifier: "my_product_identifier"
      productPlanIdentifier: invalid
      store: "app_store"
      unsubscribeDetectedAt: invalid
      willRenew: false
    }
    active: {}
  }
  firstSeen: <Component: roDateTime>
  lastSeen: <Component: roDateTime>
  latestExpirationDate: <Component: roDateTime>
  managementUrl: invalid
  nonSubscriptionTransactions: [
    {
        isSandbox: false
        originalPurchaseDate: <Component: roDateTime>
        purchaseDate: <Component: roDateTime>
        store: "roku"
        storeTransactionIdentifier: "XXXXXXX"
        transactionIdentifier: "XXXXXXX"
        productIdentifier: "my_product_id"
    }
  ]
  originalAppUserId: "$RCAnonymousID:XXXXXXXXXXXXXXXX"
  originalApplicationVersion: "1.0"
  originalPurchaseDate: <Component: roDateTime>
  requestDate: <Component: roDateTime>
}
' subscriber: The new user subscriber info
' error: Will be present if there was an error during the process
Purchases().logIn("my_user_id", sub(subscriber, error)
end sub)

' Calling logOut generates a new anonymous user
' subscriber: The new anonymous user subscriber info
' error: Will be present if there was an error during the process
Purchases().logOut(sub(subscriber, error)
end sub)
' subscriber: The current subscriber info
' error: Will be present if there was an error during the process
Purchases().getCustomerInfo(sub(subscriber, error)
end sub)
' success: Will be true if the attributes were successfully synchronized
' error: Will be present if there was an error during the process
Purchases().setAttributes({ "my attribute": "my value" }, sub(success, error)
end sub)
Offerings
- Offerings object
- Get Offerings
- Get Offerings by Placement
{
    current: {
        identifier: "my_id",
        metadata: { }, ' Metadata set in the Offering configuration
        description: "Offering description",
        annual: {}, ' The configured Annual package, if available
        monthly: {}, ' The configured Monthly package, if available
        ' A list of all available packages
        availablePackages: [
            {
                identifier: "package_identifier",
                packageType: "custom",
                ' The raw Roku store product
                 storeProduct: {
                    code: "yearly_subscription_product"
                    cost: "$1.99"
                    description: "Yearly Subscription"
                    freeTrialQuantity: 0
                    freeTrialType: "None"
                    HDPosterUrl: ""
                    id: "00000000-0000-0000-0000-000000000000"
                    inStock: "true"
                    name: "Yearly Subscription"
                    offerEndDate: "
                    offerStartDate: ""
                    productImagePortrait: ""
                    productImageUrl: ""
                    productType: "YearlySub"
                    qty: 0
                    SDPosterUrl: ""
                    trialCost: "$0.99"
                    trialQuantity: 12
                    trialType: "Months"
                }
            }
        ],
    },
    all: {
        ' An associative array of all the offerings, keyed by their identifier
    }
 }
Purchases().getOfferings(sub(offerings, error)
  if error <> invalid
    print "There was an error fetching offerings
  else

  end if

end sub)
Purchases().getOfferings(sub(offerings, error)
  if error <> invalid
    print "There was an error fetching offerings
  else
    my_offering = offerings.currentOfferingForPlacement("my_placement")
  end if
end sub)
Purchase
Making a purchase
As a parameter to the purchase() method, you can pass an associative array containing one of the following keys:
code: A string containing the product id.product: From thegetOfferingsresult: e.g.offerings.current().annual.storeProductpackage: From thegetOfferingsresult: e.g.offerings.current().annual
Additionally,you can pass the following optional parameters:
action: To perform a product change. Valid values:UpgradeorDowngrade
Sync purchases
This method will post all purchases associated with the current Roku account to RevenueCat and become associated with the current User ID. It should only be used if you're migrating from using your own Roku Pay implementation and want to track previous purchases in RevenueCat.
- Raw transaction
- Make purchase
- Sync purchases
{
    amount: "$0.00"
    code: "yearly_subscription_product"
    description: "Yearly Subscription"
    externalCode: ""
    freeTrialQuantity: 0
    freeTrialType: "None"
    name: "Yearly Subscription"
    originalAmount: "0"
    productType: "YearlySub"
    promotionApplied: false
    purchaseId: "00000000-0000-0000-0000-000000000000"
    qty: 1
    replacedOffers: []
    replacedSubscriptionId: ""
    rokuCustomerId: "00000000-0000-0000-0000-000000000000"
    total: "$0.00"
    trialCost: "$0.99"
    trialQuantity: 1
    trialType: "Years"
}
Purchases().purchase({ package: offerings.current().monthly }, sub(result, error)
  ' error will be present if the transaction could not be finished
  if error <> invalid
    if result <> invalid and result.userCancelled = true
      print "The user cancelled the purchase"
    end if
    print "The purchase could not be completed"
  else
    ' The raw transaction generated by the purchase
    result.transaction

    ' The subscriber object
    result.subscriber
  end
end sub)
' subscriber: The current subscriber info
' error: Will be present if there was an error during the process
Purchases().syncPurchases(sub(subscriber, error)
end sub)
Error
The error model contains two fields: code and message
- Error
{
  code: 1234,
  message: "There as an error",
}
Tying everything together
For most apps, the usage of the SDK would look like this:
- Initialise the SDK
- Log in the user
- Check if the entitlement is active
- Fetch offerings and show your paywall UI
- Make a purchase
- BrightScript
sub init()
  ' Initialize the SDK
  Purchases().configure({
      "apiKey": "roku_XXXXX",
      "userId": "my_user_id" ' optional, will use an anonymous user id if not provided
  })
  ' Login the user
  Purchases().logIn(m.my_user_id, sub(subscriber, error)
      if error = invalid
        ' If my entitlement is not active, fetch offerings to show the paywall
        if subscriber.entitlements.my_entitlement.isActive = false
          fetchOfferings()
        end if
      end if
  end sub)
end sub

sub fetchOfferings()
  Purchases().getOfferings(sub(offerings, error)
    if error = invalid
      ' Use offerings to build your paywall UI.
      ' Then call purchasePackage with the one selected by the user
      purchasePackage(offerings.current().annual)
    end if
  end sub)
end sub

' Call purchasePackage when the user decides to initiate a purchase
sub purchasePackage(package)
  Purchases().purchase({ package: package }, sub(result, error)
    if error = invalid
      print "Purchase successful"
      print result.transaction
      print result.subscriber
    end if
  end sub)
end sub
Testing
Only the "root account user" can test billing on device. If you get added as a collaborator to someone else's developer account, billing testing will not work. You'll need to create your own developer account.
Roku transactions do not have an "associated" environment. Both types of transactions arrive via push notifications, however, there are key differences between them.
- Price differentiation:
- Test purchases: Always have a price of 0
- Production purchases: Will have a non-zero price (unless it's a trial)
- Charges:
- Test purchases: The end customer will not be charged for a test purchase
- Production purchases: The end customer will be charged according to the product details (e.g: pricing tier, trials, offers, etc)
In order to perform a test purchase, a test user must be created and associated with the channel.
After that, the test user will be able to make test purchases on the channel, regardless of the installation method: Public, Beta or Sideloaded (Billing Testing must be enabled). However, you can only use one Roku channel at a time for testing.
RevenueCat limitations
Since Roku transactions do not have an associated environment, RevenueCat defines a "sandbox" purchase as any purchase made in a Sideloaded channel. A "production" purchase is defined as any purchase made in either a beta or public channel, regardless of whether the end customer was actually charged or not for it.
This also means for any events RevenueCat dispatches containing an environment field, the Roku channel where the purchase was made will determine whether the value is set to SANDBOX or PRODUCTION.
To ensure a clear separation between your "testing" and "production" purchases, we recommend creating a separate channel specifically for testing purchases and creating a new RevenueCat Roku Store app for that channel.
Testing with a beta channel
Roku's beta channels are a special channel type to assist with testing your channel in a production-like environment before publishing.
Beta channel rules
- 120 days: A beta channel can exist for only 120 days after you create it. After 120 days, the channel will be (1) deleted and removed from your Developer Dashboard and (2) disabled for all users who have it installed
- 10 channels: There is a maximum of 10 beta channels at a time
- 20 test users: There can only be 20 beta test users per beta channel at any given time
Limitations
RevenueCat features not yet supported:
Functionality not yet supported:
- Detecting price changes
- Chargebacks
- Extending subscriptions
If your use case is not supported above, reach out to RevenueCat Support so we can discuss more on how to support you!