Roku Product Setup
RevenueCat's Roku support is currently in beta.
To set up in-channel products for Roku, start by logging into the Roku dashboard.
This guide assumes basic knowledge of Roku and the Roku dashboard, as well as having a Roku channel set up and ready for products. For more information, visit Roku's documentation.
Create a new Product
This process is going to configure a subscription product, but the steps are similar for creating other products. To configure other types of products, select the appropriate 'Purchase Type'. However, please read our limitations on what we currently support in this beta program.
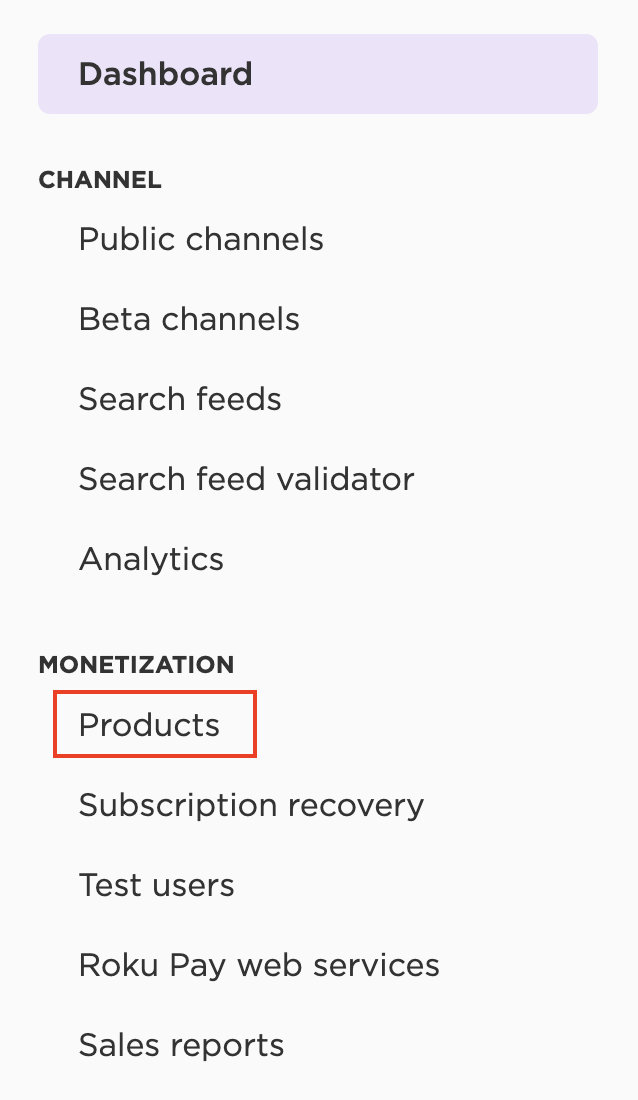
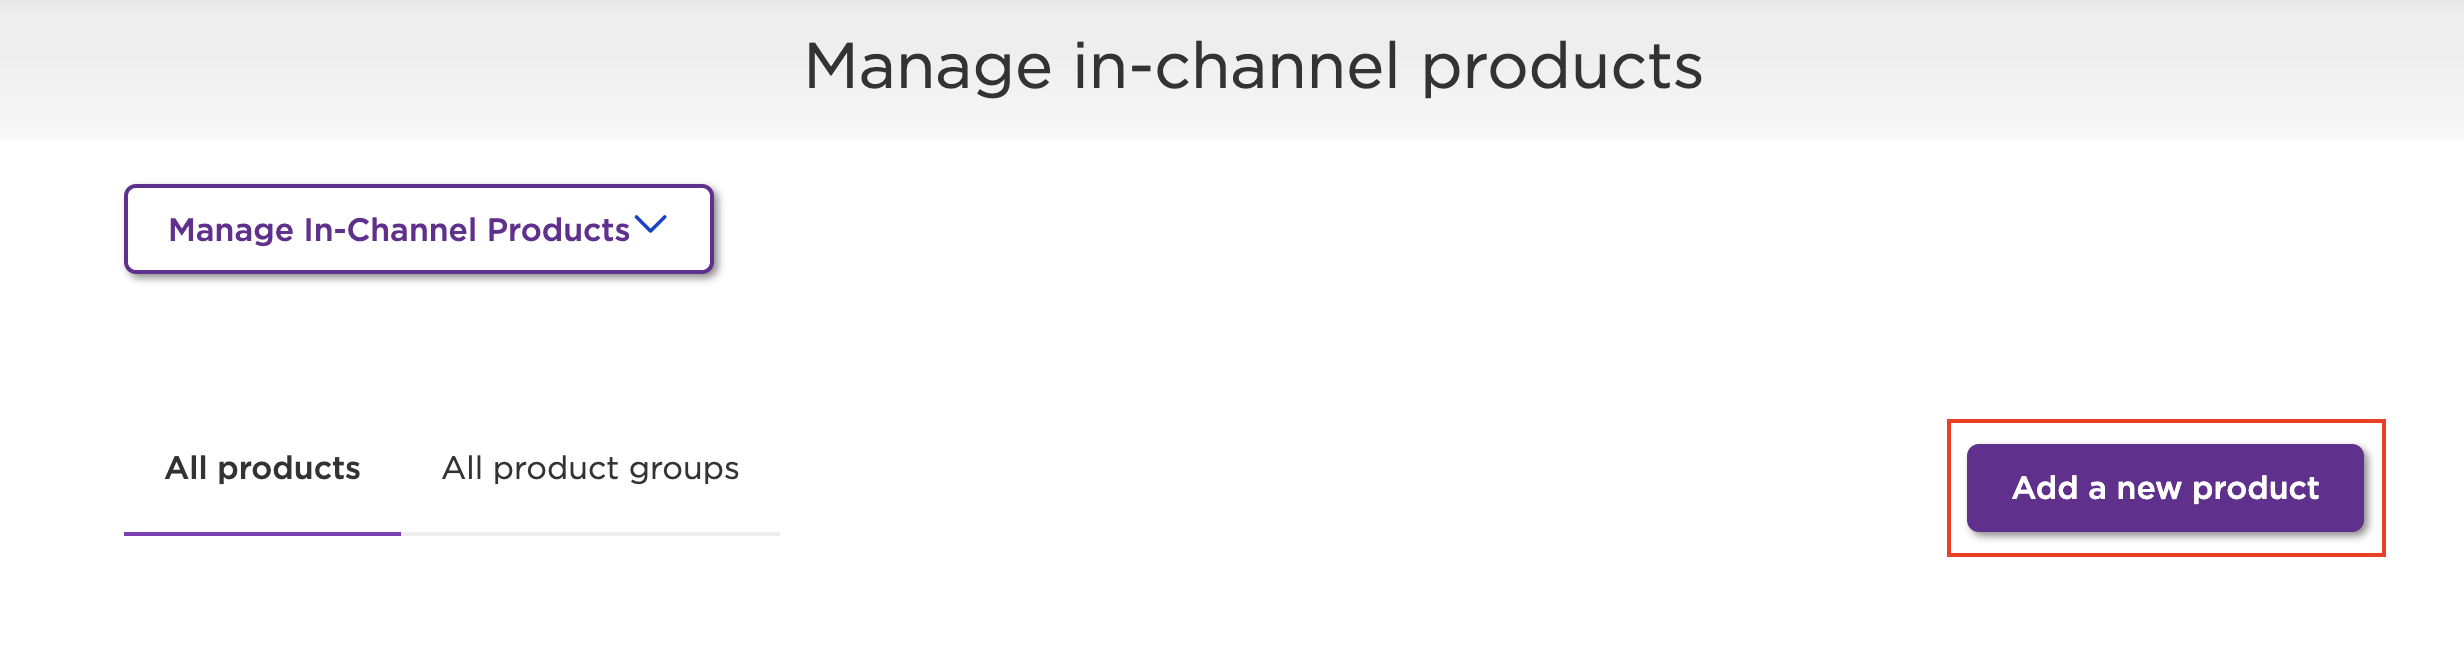
To create a new in-channel product, click on products in the sidebar of the Roku Developer Dashboard, then click Add a new product.
Product basics

- Channels: From the channels list, select one or more channels where this product will be available for sale. The channels listed in this selection show the channels belonging to the root account.
- Product category: Select a product category for the product you are creating.
- Video: Primarily video content, includes music videos.
- Audio: Primarily audio content without accompanying video, such as streaming music services or audio-only podcasts.
- Game: Primarily functions as a game.
- App/Utility: Application or utility. Examples include screensavers, weather apps, etc.
- Product name: Enter a 30-character maximum product name in English. The product name will be disaplued to your customers in their purchasing workflow, as well as emails sent by Roku. Roku recommends the following syntax: "channelName - planName".
The product name must clearly identify the service being offered. Product names may not include the name "Roku", text related to a trial or discount offer, or any misleading language.
- Localization: Optionally, you can also provide a localized product name by selecting 'Add product name in another language', selecting a language, and entering the product localized name. Repeat this to create another localized name.
- Product identifier: The product identifier is a unique ID that is used for accessing your product in development and syncing with RevenueCat. After you use a Product ID for one product within a Roku Channel Store, it can’t be used again. It helps to be a little organized here from the beginning - we recommend using a consistent naming scheme across all of your product identifiers.
Product pricing
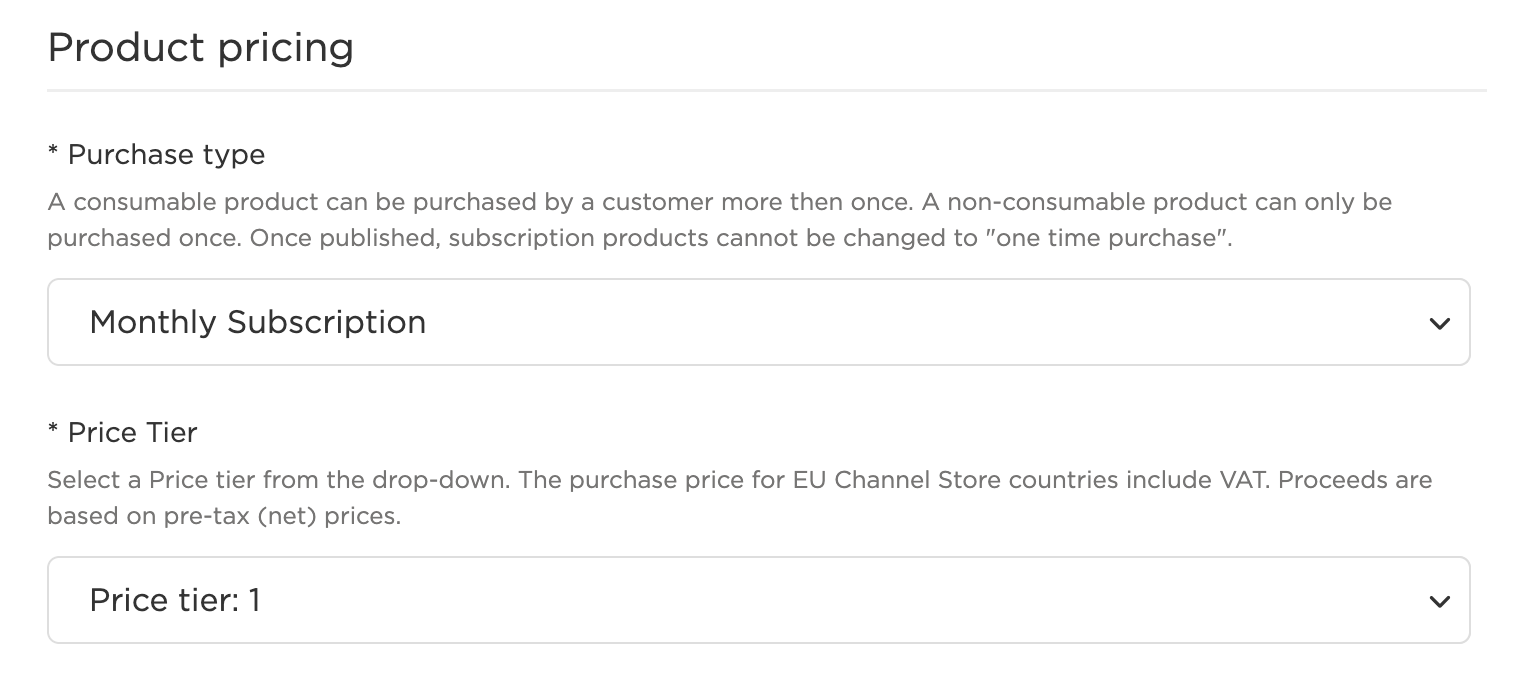
- Purchase type: The purchase type list will allow you to select the following types for the product being created:
- Monthly subscription: A product that will auto-renew monthly.
- Yearly subscription: A product that will auto-renew annually.
- One-time Purchase: This product type may only be purchased a single time.
- One-time Purchase, Consumable - Quantity This is a "packet" of identical items (e.g: number of viewings permitted).
At the moment, RevenueCat does not support One-time Purchase and One-time Purchase, Consumable - Quantity products
- Price tier: Roku's price tiers enforce a 99 cent or 49 cent pricing tier.
- One to three-digit tier numbers are used for 99 cent pricing. To calculate, you can subtract 1 cent from the tier to get the corresponding price. For example, Tier 100 is $99.99 (
$100 - $0.01 = $99.99). - Four-digit tier numbers are used for 49 cent pricing. To calculate this, you can add 49 cents to the last two digits in the tier. For example, Tier 1030 is $30.49 (30 is the last 2 digits →
$30 + $0.49 = $30.49).
- One to three-digit tier numbers are used for 99 cent pricing. To calculate, you can subtract 1 cent from the tier to get the corresponding price. For example, Tier 100 is $99.99 (
Once you select a price tier, a chart will appear that displays the purchase price, net price, and proceeds for each country the product is available for.
- Purchase price: Reflects the amount your customer will pay.
- Net price: This is the pre-tax price.
- Your proceeds: This is the amount you will receive from Roku for the sale of the product.
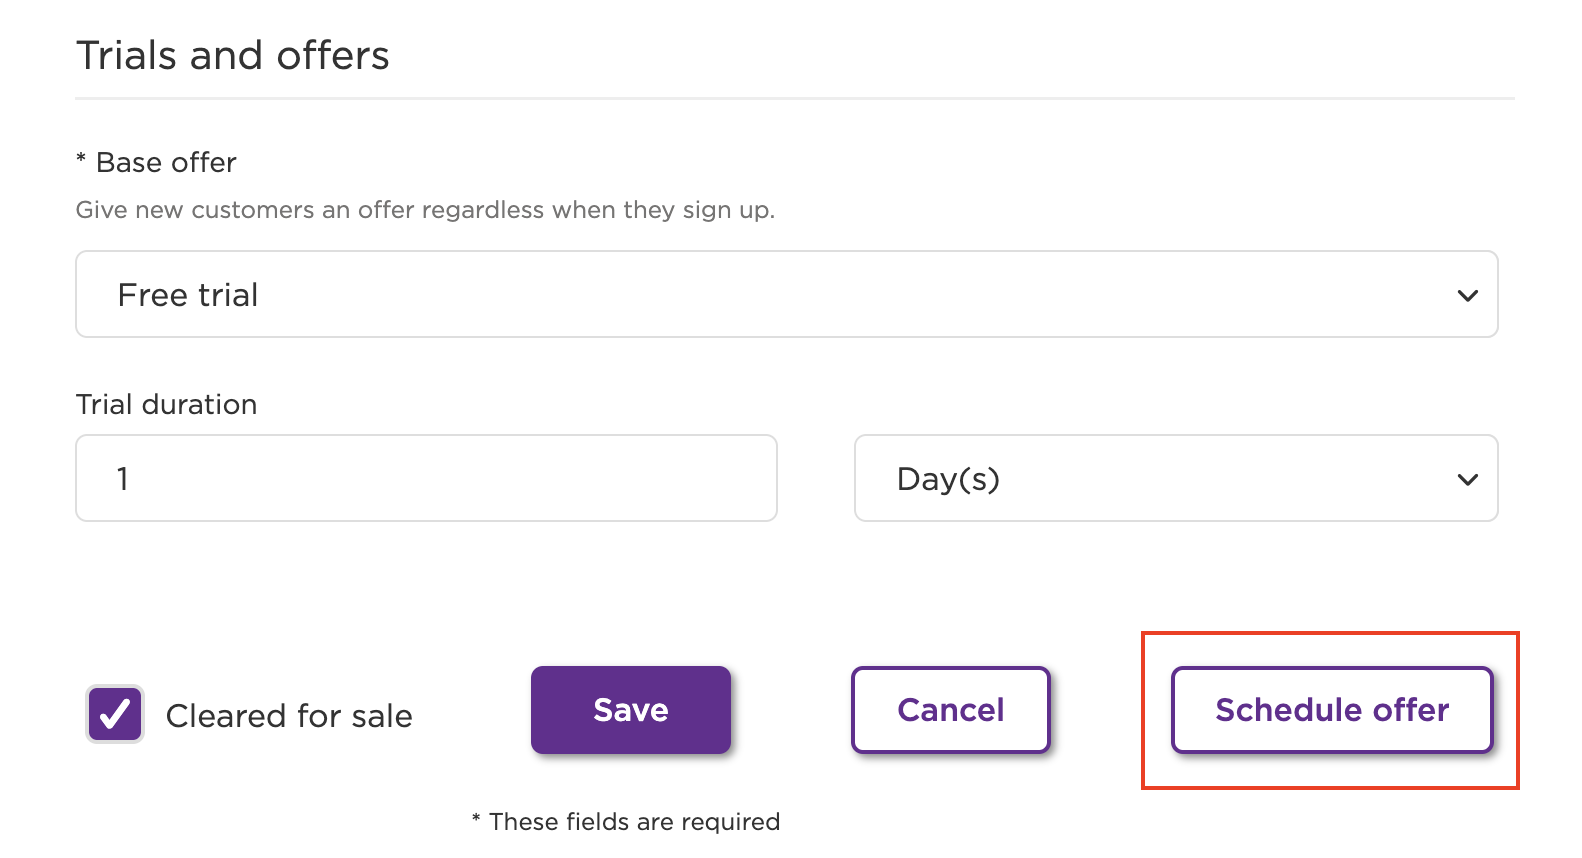
Trials and offers
Roku subscription products support free trials and discounted offers. Note that the root account must be creating free trials, discounted offers, or limited-time offers for subscriptions.
Under Base offer, select one of the following:
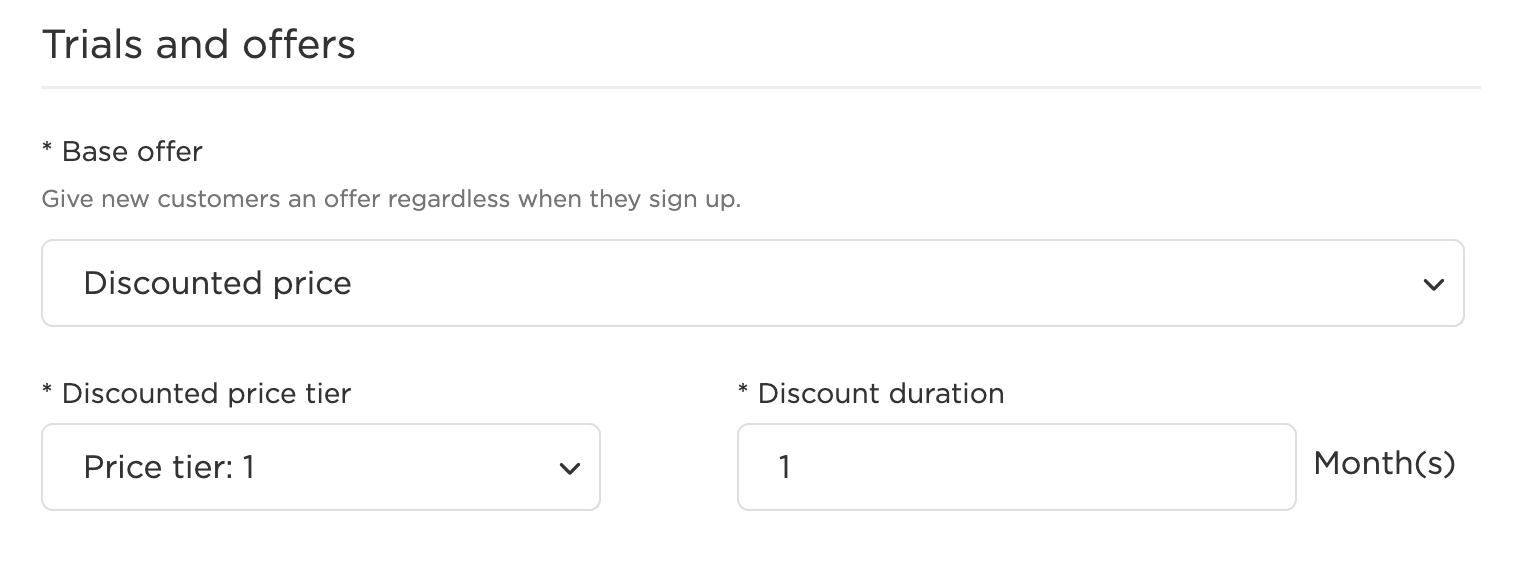
- Discounted price: This will provide new customers a discounted introductory price.
- Discounted price range: This is the discounted price you'd like to offer. The discounted price range must be lower than the base price.
- Discount duration: Enter the number of months the discount will be until the customer renews at full price.

- Free trial: This will provide new customers with a free trial of your product.
- Free trial duration: Enter the number of days or months for the trial
- Select the unit of time (Days or Months)
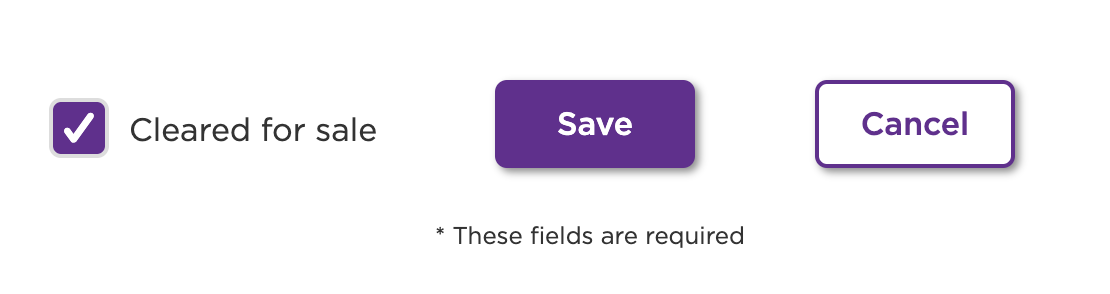
Ready for sale
Once the product is ready to be made available to customers for purchase, select the "Cleared for sale" checkbox. After selecting this checkbox, you will be able to schedule limited-time free trials and discount offers for the product.
Scheduling offers
Once your product is cleared for sale, you can schedule limited-time free trials and discount offers on your subscription products.
Within your product details, you can select 'Schedule offer' > 'Create new offer'.
Please refer to the Trials and offers section of this documentation for additional instructions on creating an offer. When scheduling an offer, you must input a Start date and End date.
Note that a customer can only receive one free trial or discount offer, regardless if it is a scheduled offer or part of your base product. For example, if you have a monthly subscription product with the following offers:
- Time-limited offer: Two-month free trial
- Base offer: Three-month 50% discount
When your customer accepts a two-month free trial, once that trial is over the customer will be billed at full price. If your subscription product does not contain a time-limited offer, the customer would be billed for the first three months at 50% then convert to paying full price.
Editing / deleting products
Edit products
You can edit a product by selecting the Product name in your Manage In-Channel Products index page. You may want to edit a product if you no longer wish to list a product for sale.
Note that changing the Cleared for Sale to "No" will cancel all existing subscriptions of the product and will not renew at the end of the billing period.
Deleting products
Deleted products cannot be recovered.
Note that deleting a product without first changing its Cleared for Sale status to "No" will keep the current subscriptions of the product active and will prevent additional purchases of the subscription product.
Product groups
Product groups are used for upgrade/downgrade functionality and to prevent double billing your customers. For more information regarding upgrades/downgrades, please visit our documentation on Upgrades, Downgrades, & Management.
To set up a product group, navigate to your 'Manage In-Channel Products' > 'All product groups' > 'Add a new group'

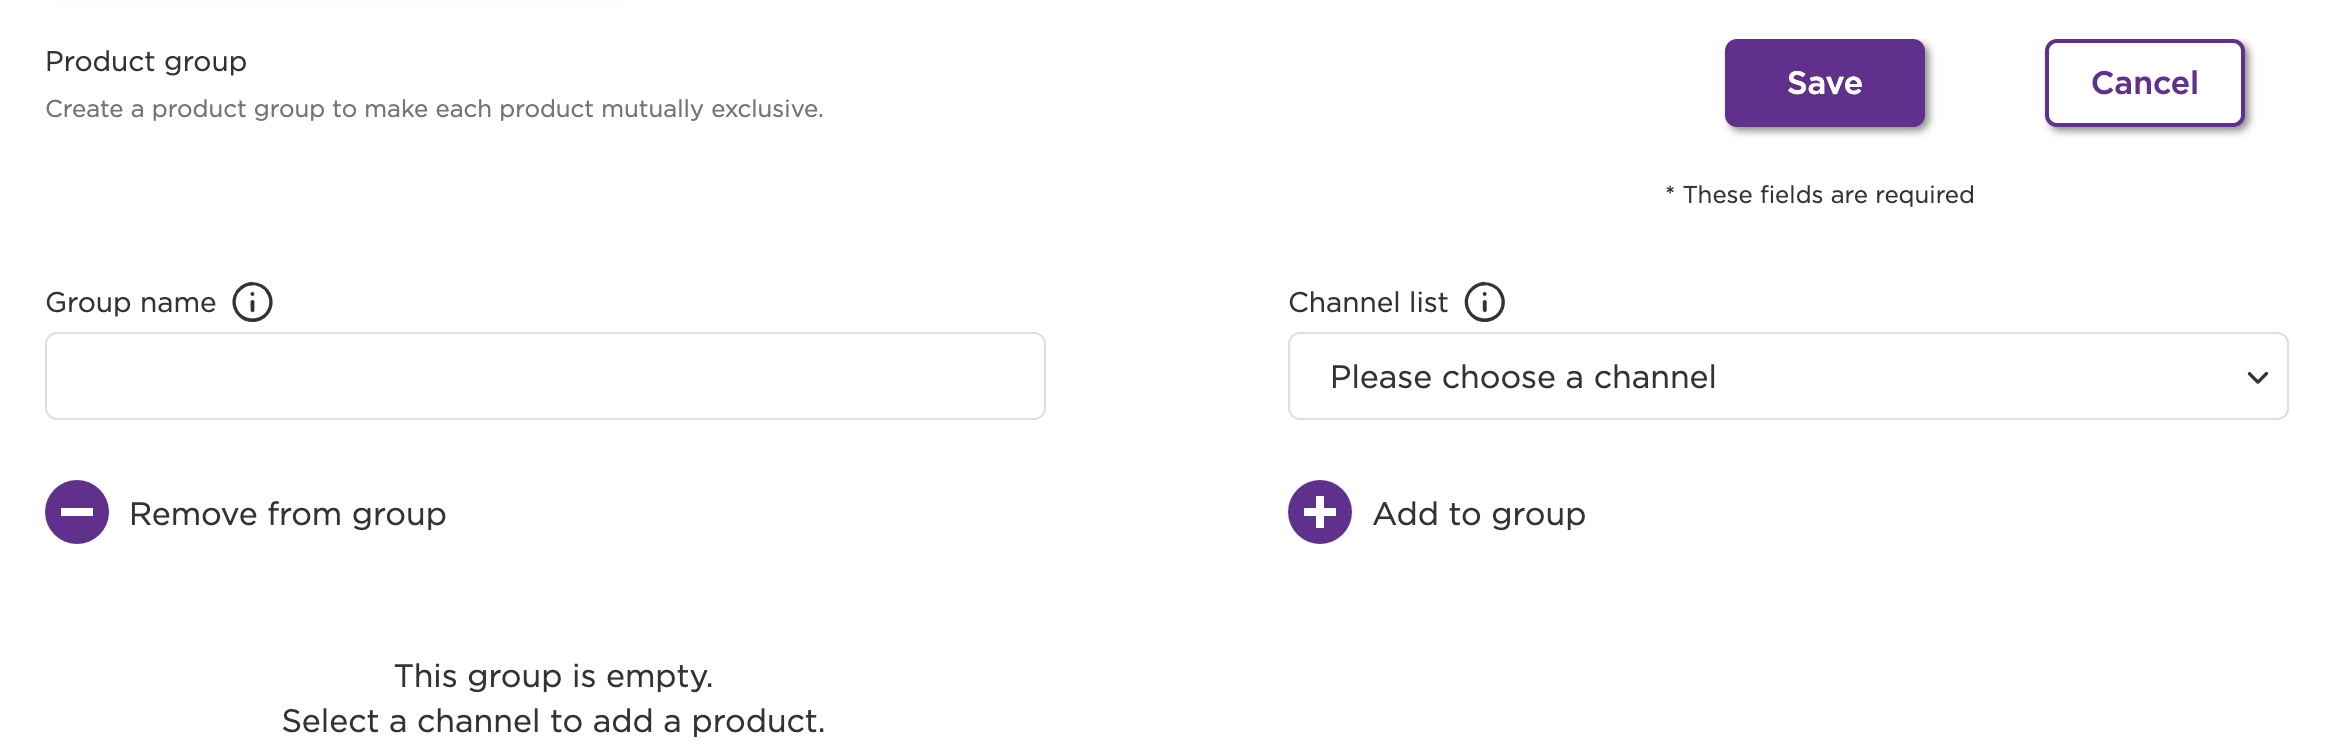
- Group name: Enter a descriptive name for your group. For example, if you are creating a product group containing monthly and annual plans that will unlock the highest tier subscription, it could be named "High tier subscriptions"
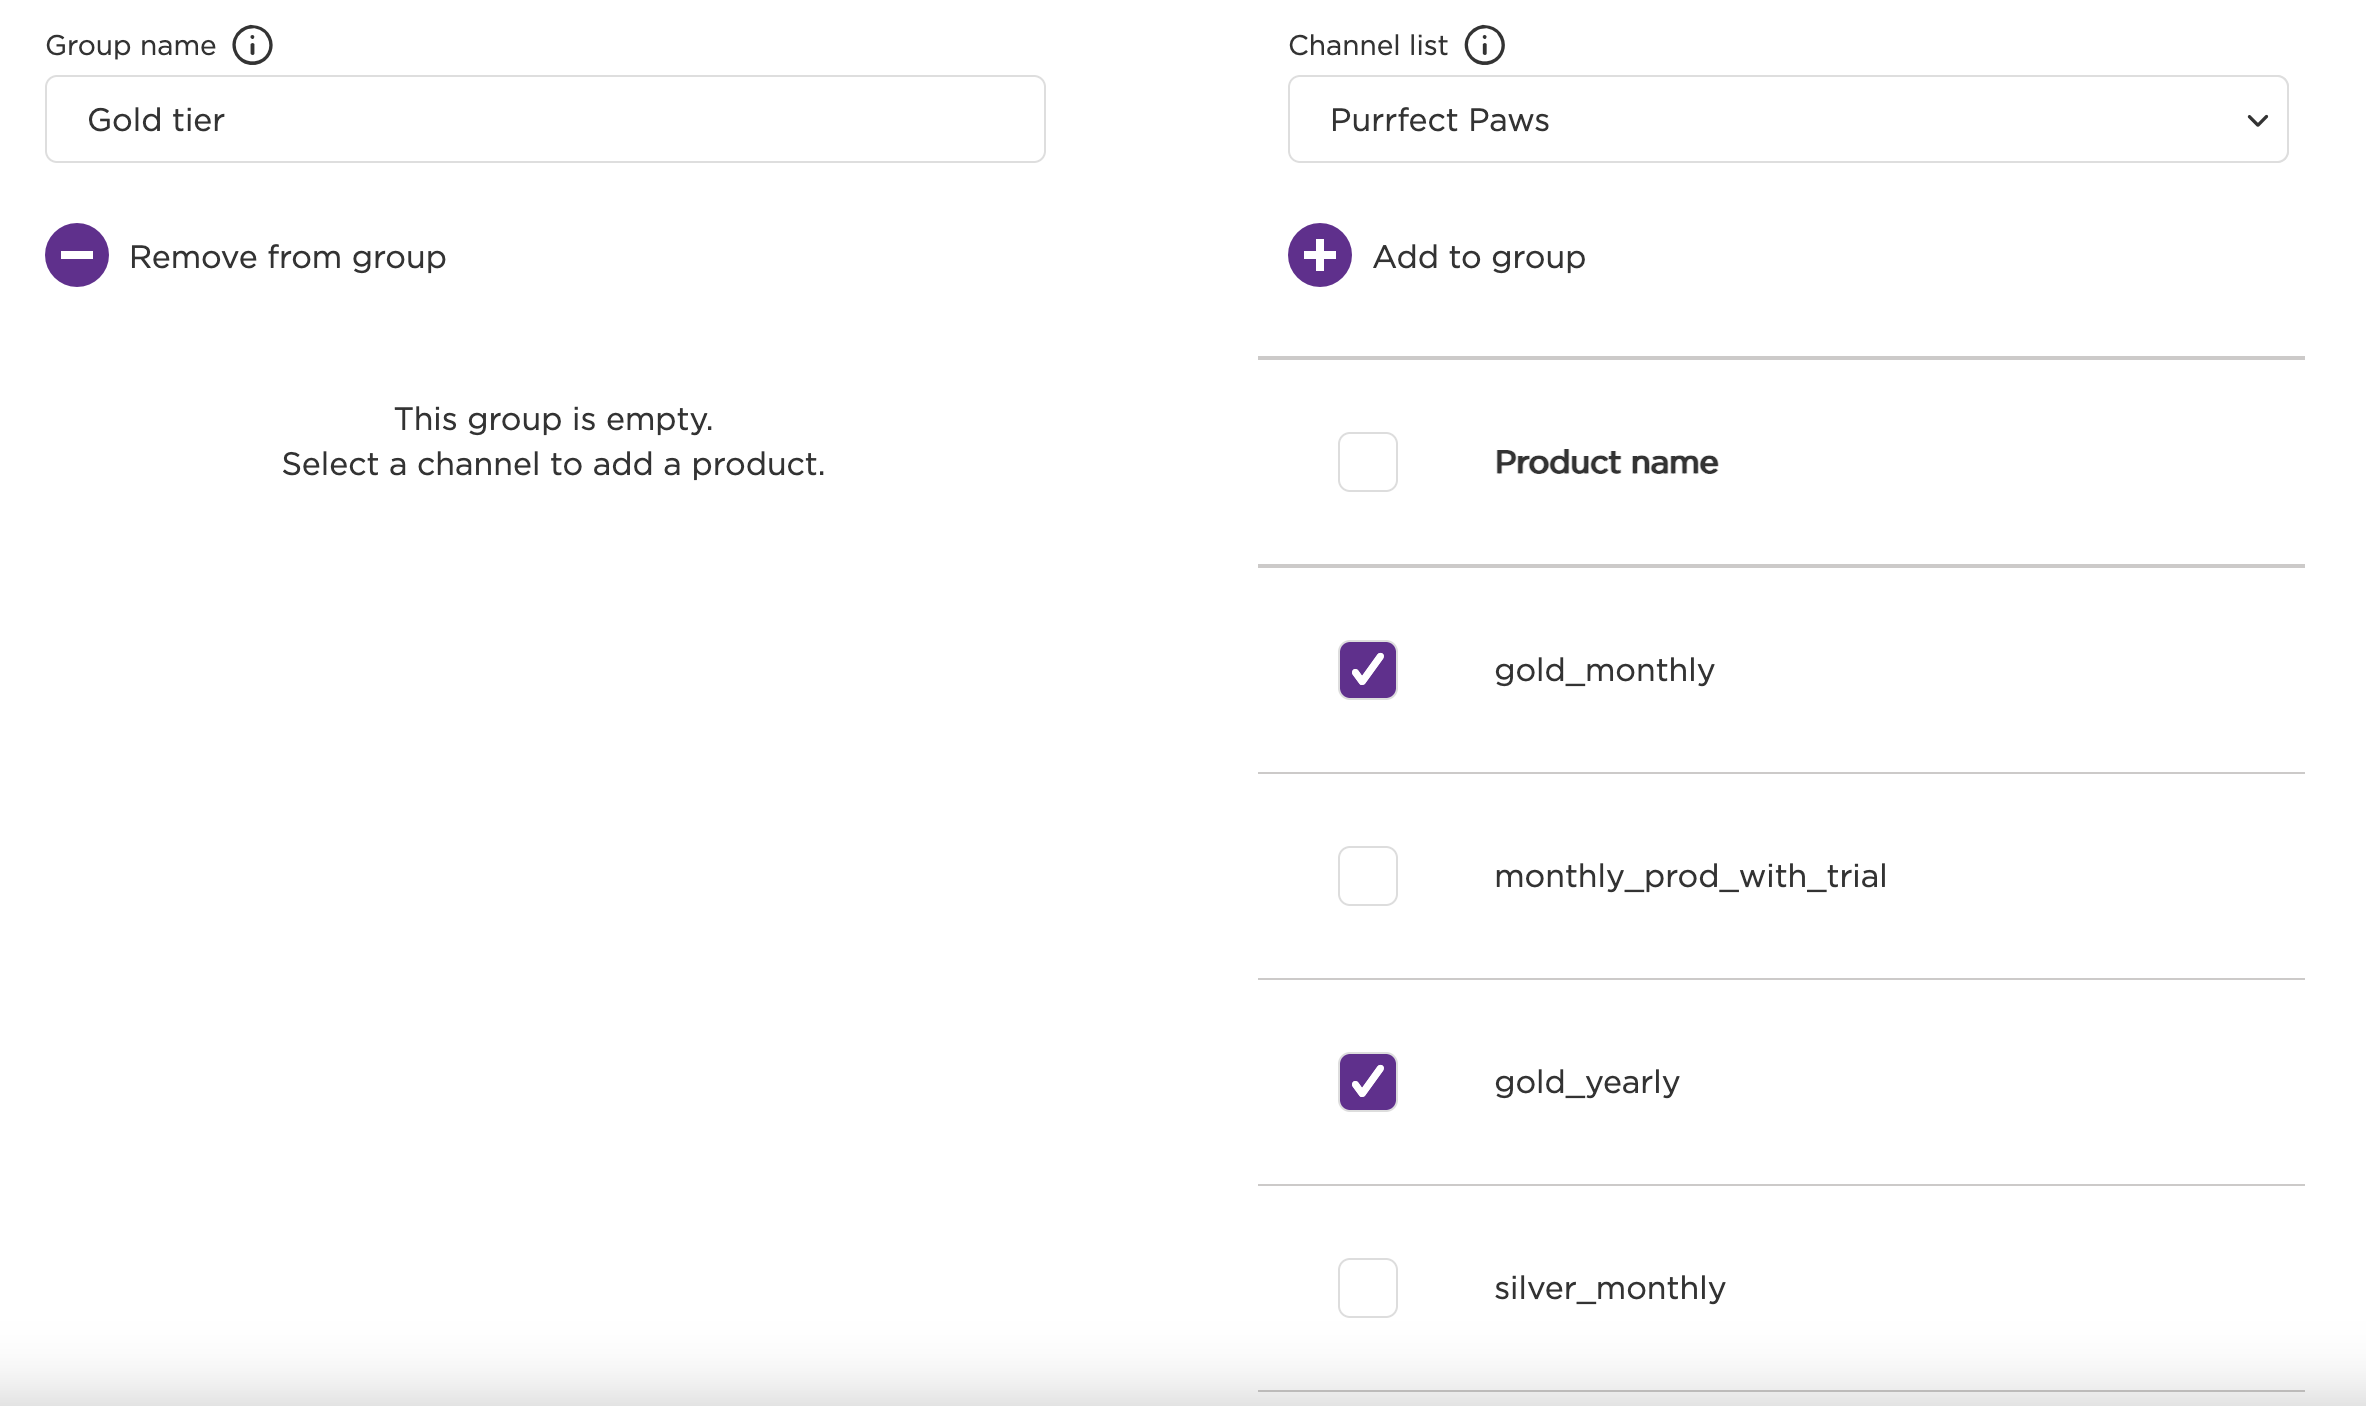
- Channel list: Select the channel that will use this product group
Once you have selected your channel, your in-channel products will appear on the right-hand side. Select which products you'd like to include in your product group, then click + Add to group on the right-hand side to add the product names to your group. To remove a product from your group, select the product name under Remove from group on the left-hand side and select Remove from group
Integrate with RevenueCat
If you're ready to integrate your new Roku product with RevenueCat, continue our product setup guide →.